Monday, December 6, 2010

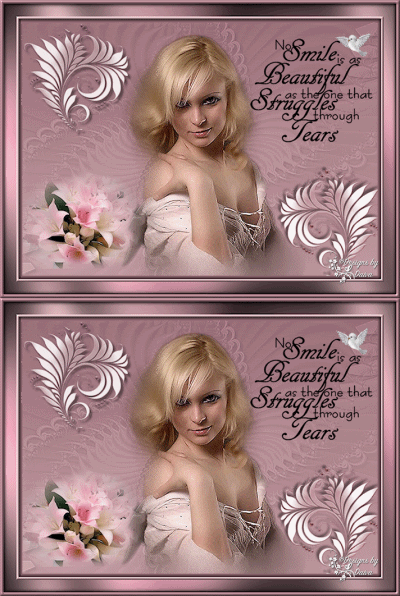
Beautiful Smile


Written by ©Daiva C.
Feb. 04, 2010
Released May 08, 2010

This tutorial is my own
creation, any similarities
to any other tutorial are
purely accidental and not
intentional.
This tutorial is intended
for non-profit use only.
I hold the copyright to it.
Please do not copy,
translate, script, rip or
claim it as your own.
You may share it but do
NOT upload it to any
website, storage site or
group files without my
written consent.
Thank you.
Written for PSP X2
Skill Level: Intermediate

Supplies:
5185dwtubes.pspimage
Background Swatch.jpg
bouquet20.psp
CS_snowprincess_doodle
1.pspimage
dm_frac1.msk
Foreground Swatch.jpg
vogel.gif
wordart-smile_NekkeyOne¬.psp
Supplies Available (Here)
and (Here)
Animation Shop (Here)
Demo

Filters:
Greg's Factory Output
Vol. ll > Pool Shadow

Preparation:
Unzip Supplies
Install Filter if Needed
Save dm_frac1.msk to
your Psp Mask Folder
vogel.gif is to be
opened in Animation
Shop
Open supplies in PSP
Minimize

Performation Notes:
All settings will remain
the same unless new or
revised ones are given

1. Activate 5185dwtubes.
pspimage

2. Dropper Tool
Settings:
Foreground Color = Light
color from Workspace
or you may use the
Foreground Swatch.jpg
from the supplies
Background Color = Medium
to Dark color from Work-
space or use the Back-
ground Swatch supplied

Note:
Make note of Hue and
Saturation #'s for Fore-
ground and Background
Colors

3. Edit > Copy
Close

4. File > New
Settings:
Width = 700 pixels
Height = 500 pixels
Raster Background =
Checked
Transparent = Checked

5. Flood Fill Tool
Settings:
Match mode = RGB value
Tolerance = 0
Use all layers = Not
Checked
Blend mode = Normal
Opacity = 100
Fill Workspace with 
Background Color

6. Layers > New Raster
Layer

7. Flood Fill Tool
Fill Layer with Foreground
Color

8. Layers > Load/Save
Mask > Load Mask From
Disk
Settings:
dm_frac1.msk
Source luminance = Checked
Fit to canvas = Checked
Invert transparency = Not
Checked
Hide all mask = Checked

9. Layers > Merge > Merge
Group

10. Effects > Edge Effects >
Enhance

11. Effects > 3D Effects >
Drop Shadow
Settings:
Vertical = 5
Horizontal = 5
Opacity = 50
Blur = 5
Color = Black
Shadow on new layer
= Not Checked

12. Layers > New Raster
Layer

13. Materials Palette
Change Foreground to
Gradient
Settings:
Foreground-Background
Angle = 0
Repeats = 0
Invert = Not Checked
Texture = Not Checked
Style = Linear

14. Flood Fill Tool
Fill Layer with Gradient

15. Layers Palette
Settings:
Opacity = 75

16. Edit > Paste As New
Layer

17. Move Tool
Move to bottom of
workspace and a bit
to the right

18. Activate bouquet20.
pspimage

19. Edit > Copy
Close

20. Back to Workspace

21. Edit > Paste As New
Layer

22. Move Tool
Move to Lower Left Corner

23. Activate CS_snowprin-
cess_doodle1.pspimage

24. Shift D > Close Original

25. Adjust > Hue and
Saturation > Colorize
Settings:
To Match Foreground
Color

26. Edit > Copy
Minimize

27. Back to Workspace

28. Edit > Paste As New
Layer

29. Move Tool
Move to Lower Right
Corner

30. Layers Palette
Settings:
Opacity = 91

31. Effects > 3D Effects >
Drop Shadow

32. Back to CS_snowprin-
cess_doodle1.pspimage

33. Edit > Undo Colorize

34. Adjust > Hue and
Saturation > Colorize
Settings:
To Match Background
Color

35. Image > Mirror

36. Edit > Copy
Close

37. Back to Workspace

38. Edit > Paste As New
Layer

39. Move Tool
Move to Upper Left
Corner

40. Layers Palette
Settings:
Opacity = 85

41. Effects > 3D Effects >
Drop Shadow
Settings:
Vertical = -5 (Minus)
Horizontal = -5 (Minus)

42. Activate wordart-smile_
NekkeyOne¬.psp

43. Edit > Copy
Close

44. Back to Workspace

45. Edit > Paste As New
Layer

46. Move Tool
Move to Upper Right
Corner

47. Image > Add Borders
Settings:
Symmetric = Checked
Size in pixels = 7
Color = Background
Color

48. Image > Add Borders
Settings:
Size in pixels = 5
Color = Foreground
Color

49. Magic Wand Tool
Settings:
Mode = Add/Shift
Match mode = RGB
Value
Tolerance = 0
Use all layers = Not
Checked
Contiguous = Checked
Feather = 0
Anti-alias = Checked
Outside
Select Border
50. Effects > 3D Effects >
Inner Bevel
Settings:
Bevel = 2
Width = 15
Smoothness = 5
Depth = 4
Ambience = 5
Shininess = 40
Color = White
Angle = 315
Intensity = 30
Elevation = 50
51. Effects > 3D Effects >
Drop Shadow
Settings:
Vertical = 1
Horizontal = 1
Opacity = 100
Blur = 10
52. Effects > 3D Effects >
Drop Shadow
Settings:
Vertical = -1 (Minus)
Horizontal = -1 (Minus)
53. Selections > Select
None
54. Image > Add Borders
Settings:
Size in pixels = 25
Color = White
55. Magic Wand Tool
Select Border
56. Materials Palette
Change Gradient
Settings:
Angle = 45
Repeats = 3
57. Flood Fill Tool
Fill Border with Gradient
58. Effects > Plugins > Greg's
Factory Output Vol. ll > Pool
Shadow
Settings:
Default
59. Selections > Select
None
60. Image > Add Borders
Settings:
Size in pixels = 7
Color = Background
Color
61. Magic Wand Tool
Select Border
62. Effects > 3D Effects >
Inner Bevel
63. Effects > 3D Effects >
Drop Shadow
64. Effects > 3D Effects >
Drop Shadow
Settings:
Vertical = 1
Horizontal = 1
65. Selections > Select
None
66. Image > Resize
Settings:
To your Liking
67. Layers > New Raster
Layer
68. Add Watermark
69. Edit > Copy Special >
Copy Merged
70. Open Animation Shop
71. Edit > Paste As New
Animation
72. File > Open
Settings:
vogel.gif
73. Edit > Select All
74. Back to your Header
75. Edit > Duplicate
Selected
76. Highlight Frame 1
77. Select All
78. Back to vogel.gif
79. Drag the dove to your
header and position it
to your liking
80. File > Save As
Settings:
Follow saving directions
 
I'd like to thank the testers
from
for testing this tutorial for me
and making it the best it can be.
They are: Alicia, Brenda, Karen,
Marsha, Sue, Susan, Susan T.,
and Wendy
Please link back to
I hope you have enjoyed my
tutorial, as much as I enjoyed
writing it

Tuesday, November 23, 2010

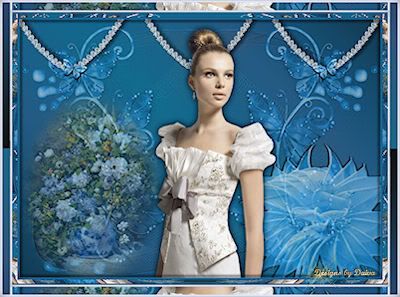
Butterflies Are Free

Written by ©Daiva C.
March 10, 2010
Released June 08, 2010

This tutorial is my own
creation, any similarities
to any other tutorial are
purely accidental and not
intentional.
This tutorial is intended
for non-profit use only.
I hold the copyright to it.
Please do not copy,
translate, script, rip or
claim it as your own.
You may share it but do
NOT upload it to any
website, storage site or
group files without my
written consent.
Thank you.
Written for PSP X2
Skill Level: Intermediate

Supplies:
10deco70.psp
Background Swatch.jpg
chrismist_ss_080 .pspimage
diamondscallops.psp
image
fleur-gb7-tube-colombe.
pspimage
Foreground Swatch.jpg
Kaedee~MastersArt~
FlowerVase.psp
maskdragonfly_lamia
grafica.jpg
Sm_Butterfly.pspimage
teom_65.jgd
Supplies are Available
(Here) and (Here)

Filters:
FunHouse > Radial
Tile Mirror (Here)
Simple > Top Bottom
Wrap (Here)

Preparation:
Unzip supplies
Install Filters if
needed
Save maskdragonfly
_lamiagrafica.jpg
to your PSP Mask
Folder
Save teom_65.jgd to
your PSP Gradient
Folder
Open remaining
supplies in PSP
Minimize

Performance Notes:
All settings will remain
the same unless new or
revised ones are given

1. File > New
Settings:
Width = 700 pixels
Height = 500 pixels
Raster Background =
Checked
Transparent = Checked

2. Materials Palette
Foreground = Gradient
of Choice or use the
one supplied
(teom_65.jgd)
Settings:
Foreground-Background
Angle = 45
Repeats = 1
Invert = Not Checked
Texture = Not Checked
Style = Linear

3. Flood Fill Tool
Settings:
Match mode = RGB Value
Tolerance = 0
Use all layers = Not
Checked
Blend mode = Normal
Opacity = 100
Fill Workspace with
Gradient

4. Materials Palette
Settings:
Foreground = Light Color
From Gradient or use the
Foreground Swatch supplied
Background = Medium
to Dark color from
Gradient or use Back
ground Swatch supplied

Note:
Make note of Hue and
Saturation #'s for Back
ground Color
5. Layers > New Raster
Layer

6. Flood Fill Tool
Fill Layer with
Background Color

7. Layers > Load/Save
Mask > Load Mask
From Disk
Settings:
maskdragonfly_lamia
grafica.jpg
Source luminance =
Checked
Fit to canvas = Checked
Invert transparency =
Not Checked
Hide all mask = Checked

8. Layers > Merge > Merge
Group

9. Effects > Edge Effects
> Enhance

10. Layers Palette
Settings:
Opacity = 51

11. Activate 10deco70.psp

12. Edit > Copy
Close

13. Back to Workspace

14. Edit > Paste As New
Layer

15. Adjust > Hue and
Saturation > Colorize
Settings:
To Match Background
Color

16. Move Tool
Move to Left Side of
Workspace towards
the bottom

17. Layers Palette
Settings:
Opacity = 57

18. Adjust > Sharpness
> Sharpen

19. Layers > Duplicate

20. Image > Mirror

21. Activate Kaedee
~MastersArt~Flower
Vase.psp

22. Edit > Copy
Close

23. Back to Workspace

24. Edit > Paste As New
Layer

25. Move Tool
Move to lower left corner

26. Layers Palette
Settings:
Opacity = 67

27. Activate diamond
scallops.pspimage

28. Edit > Copy
Close

29. Back to Workspace

30. Edit > Paste As New
Layer

31. Layers Palette
Settings:
Opacity = 75

32. Adjust > Sharpness
> Sharpen

33. Repeat > Sharpen

34. Move Tool
Move to Top of
Workspace

35. Activate Sm_Butterfly.
pspimage

36. Edit > Copy
Close

37. Back to Workspace

38. Edit > Paste As New
Layer

39. Adjust > Hue and
Saturation > Colorize

40. Move Tool
Move to center scallop
of diamondscallops.
pspimage

41. Effects > 3D Effects
> Drop Shadow
Settings:
Vertical = 3
Horizontal = 1
Opacity = 100
Blur = 1
Color = Black
Shadow on new
layer = Not Checked

42. Adjust > Sharpness >
Sharpen

43. Edit > Repeat Sharpen

44. Layers > Duplicate

45. Image > Mirror

46. Move Tool
Move to Right scallop
of diamondscallops.
pspimage

47. Layers > Duplicate

48. Image > Mirror

49. Activate chrismist_ss
_080 .pspimage

50. Edit > Copy
Close

51. Back to Workspace

52. Edit > Paste As New
Layer

53. Move Tool
Move to bottom and a
little to the right of
workspace

54. Effects > 3D Effects >
Drop Shadow
Settings:
Vertical = 0
Horizontal = 0
Opacity = 100
Blur = 20

55. Activate fleur-gb7-
tube-colombe.pspimage

56. Edit > Copy
Close

57. Back to Workspace

58. Edit > Paste As
New Layer

59. Move Tool
Move to lower right
corner

60. Adjust > Hue and
Saturation > Colorize

61. Effects > 3D Effects
> Drop Shadow
Settings:
Vertical = 1
Horizontal = 3
Opacity = 100
Blur = 1

62. Effects > 3D Effects
> Drop Shadow
Settings:
Vertical = -1 (Minus)
Horizontal = -3 (Minus)

63. Layers > Arrange >
Move Down

64. Layers Palette
Settings:
Opacity = 55

65. Image > Add Borders
Settings:
Symmetric = Checked
Size in pixels = 4
Color = Background
Color

66. Magic Wand Tool
Settings:
Mode = Add/Shift
Match mode = RGB
Value
Tolerance = 0
Use all layers = Not
Checked
Contiguous = Checked
Feather = 0
Anti-alias = Checked
Outside
Select Border
 
67. Effects > 3D Effects
> Inner Bevel
Settings:
Bevel = 2
Width = 10
Smoothness = 55
Depth = 26
Ambience = -14 (Minus)
Shininess = 10
Color = White
Angle = 315
Intensity = 30
Elevation = 88
 
68. Effects > 3D Effects
> Drop Shadow
Settings:
Vertical = 5
Horizontal = 5
Opacity = 50
Blur = 5
 
69. Effects > 3D Effects
> Drop Shadow
Settings:
Vertical = -5 (Minus)
Horizontal = -5 (Minus)
 
70. Selections > Select
None
 
71. Image > Add Borders
Settings:
Size in pixels = 10
Color = White
 
72. Magic Wand Tool
Select Border
 
73. Flood Fill Tool
Fill Border with
Gradient
 
74. Effects > Plugins >
FunHouse > Radial Tile
Mirror
Settings:
Default
 
75. Adjust > Sharpness >
Sharpen
 
76. Selections > Select
None
 
77. Materials Palette
Settings:
Change Background to
Light Color from Header
or use my Foreground
Swatch from Supplies
 
78. Image > Add Borders
Settings:
Size in pixels = 4
Color = Foreground
Color
 
79. Magic Wand Tool
Select Border
 
80. Effects > 3D Effects
> Inner Bevel
 
81. Selections > Select
None
 
82. Image > Add Borders
Settings:
Size in pixels = 15
Color = White
 
83. Magic Wand Tool
Select Border
 
84. Flood Fill Tool
Fill Border with Gradient
 
85. Effects > Plugins
> Simple > Top
Bottom Wrap
 
86. Adjust > Sharpness
> Sharpen
 
87. Selections > Select
None
 
88. Image > Add Borders
Settings:
Size in pixels = 4
Color = Light Color
 
89. Magic Wand Tool
Select Border
 
90. Effects > 3D Effects >
Inner Bevel
 
91. Selections > Select
None
 
92. Image > Resize
Settings:
Your Preference
 
93. Layers > New Raster
Layer
 
94. Add Watermark
 
95. File > Export > JPEG
Optimizer
Settings:
Set compression value
to 20
I'd like to thank the testers
from: 
for testing this tutorial for me
and making it the best it can be.
They are: Alicia, Charo, Cheryl,
Diane, Estella, Karen, Nahdiyyah,
Phyllis, Shirley, Sue and Wendy
Please link back to
I hope you have enjoyed my
tutorial, as much as I enjoyed
writing it